The project is divided in sections/chapters. Please click on the buttons
inside the tabbed menu to navegate betweeen chapters:
My Own Server At Home
About This Website
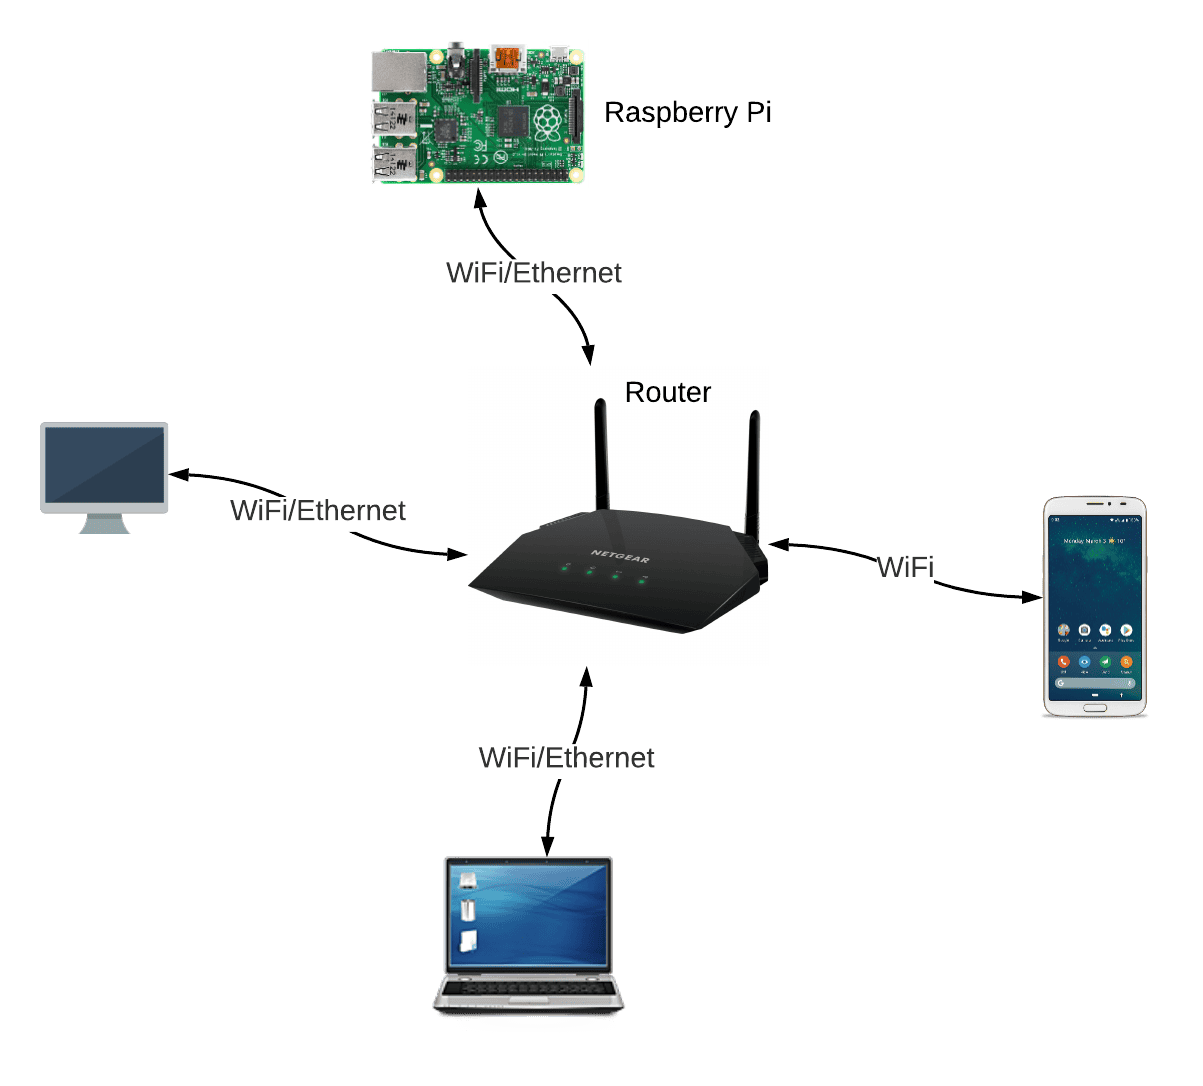
When you visit my website, you are connecting directly to my
self-hosted home server: a Raspberry Pi 4. All the files needed
to make the website work are stored on it using docker
containers.
For those who does not know, a
Raspberry Pi
is a single-board computers of the size of a credit-card. It is
a low cost device developed in the UK.
How Is It Built?
Visit my GitHub
repository
to see all the source code for this project.
The structure and documentation is saved on an HTML file, the
design on a CSS file and the user's interface on a Javascript
file.
To learn how to use the command line in Linux and move
around my server as a pro.
To learn Docker and Docker Compose.
To deploy containers and learn how to use Portainer and many
other self-hosted apps.
To force myself to document all the projects I develop, and
more importantly, finish them.
To build my first blog/website from scratch with usefull
information about the process and be able to go back in time
and recreate the project if needed it.
To Develope frontEnd and BackEnd skills
To sufil my needs of having to store private information. a
centralize storage unit.
References
I have to get credit to multiple youtubers and other sources
that contribute in some form to this project. With that been
said, I will be adding the links for those videos if you want to
have a more visual idea.
TITLE HEADING
Title description, Sep 2, 2017
Some text..
Sunt in culpa qui officia deserunt mollit anim id est laborum
consectetur adipiscing elit, sed do eiusmod tempor incididunt ut
labore et dolore magna aliqua. Ut enim ad minim veniam, quis
nostrud exercitation ullamco.
Search by Apps
Click on the app image to get more information
LAN + Pi
Some text about me in culpa qui officia deserunt mollit anim..
Popular Post
Image
Image
Image
Follow Me
Some text..
Chapter One
In this Chapter we will install the OS and setup the Raspberry Pi to
boot from USB. Then, we will install Docker, install
Portainer, and install Shell In A Box.
Pi 4
SD → To config Usb bootloader
SSD or USB or HDD
HDMI cord
Step by step:
Make sure to format the SD and the SSD before.
Go to Rpi website to download and Install the "Pi Imager"
Once it is installed, connect the SD card and flash Raspberry
Desktop OS.
I suggest to flash the Pi with the RPi Desktop version
instead of the Lite version (as suggested in the video)
Other than that, I follow steps in minute
2:18.
Access the Advance options for the OS setup
Remember to use the Ctrl + Shift + x to see the
Advance options.
Disable overscan
Set hostname: rpi-srv
Enable SSH
Set Password
Set Configure WIFI & country
Set Local & Keyboard Layout
Skip first-run Wizard.
Disable Telemetry.
Flash RPi OS
— Flash RPi Desktop(not lite as in video) OS (
Ctrl + Shift + x → Advance options)
Note: The Raspberry Pi needs to Boot from USB. Which
means that we need to Update EEPROM on.
Personal Note: I had some issues following this particular video
since the video skip the step where you need to config the USB
bootloader. Instead, in the video, they flash the OS on the HDD
instead of doing it on a SD and then copy everything from the SD
to the SSD from the pi.
How to Update EEPROM on Raspberry Pi 4 For USB Boot...
Install latest bootloader
sudo rpi-eeprom-update -d -a
Launch this tool for final configurations
sudo raspi-config
advance options > boot order > USB
advance options > bootloader Version > E1 - last version ROM
display options > Resolution > MODE 82 - 16:9
Reboot Raspberry Pi
sudo reboot
Copy SD to USB or SSD
Connect to Pi using HDMI or VNC
Enable VNC in the Pi
Interface menu > VNC > enable. Using the code below:
sudo raspi-config
Go to Menu > accessories > SD card copy.
From SD (dev/mmcblk) to SSD
sudo reboot
Once it Finish, Turn off the pi Remove the SD and boot
from SSD
sudo poweroff
To setup a Static IP address
Go to the Router and assign an IP.
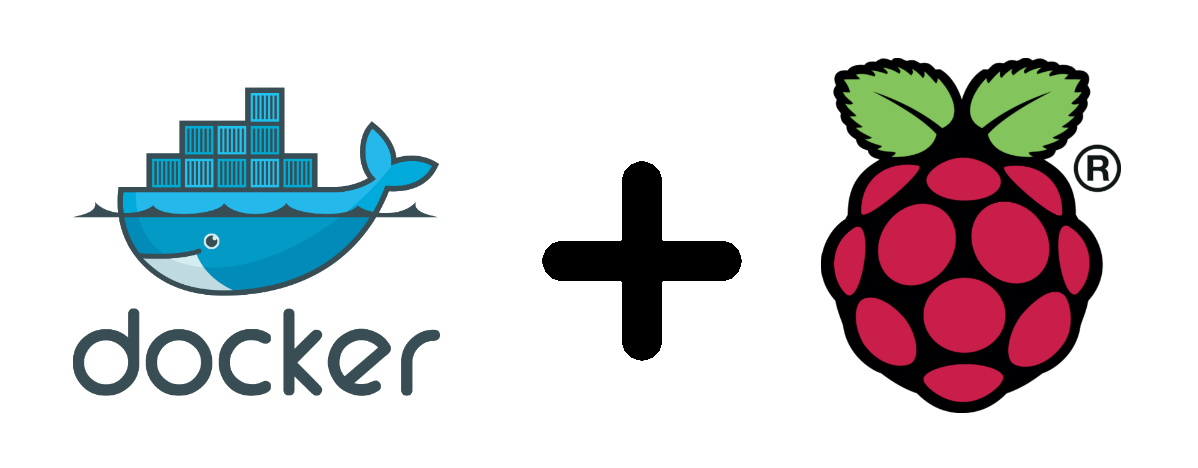
Docker on Raspberry Pi
5:46 — Docker Explained
6:32 — Install Docker
Install git
Sudo apt install git
Run Script
1. cd Downloads
2. git clone https://github.com/novaspirit/pi-hosted
3. cd pi-hosted
4. ls
5. ./install_docker.sh #install docker
6. exit #logout
7. login
8. groups #to check if docker is in the group
Portainer
Run Script
1. cd Downloads/pi-hosted
2. ./install_portainer.sh #install portainer
3. cat install_portainer.sh # to check what is in the script
Note: Basado en el Docker Compose de arriba es q se configura la
info de abajo:
Containers > Add Container
Name: FileBrowser
Image: filebrowser/filebrowser
Manual network port publishing: Click on publish a new
network port
Host: 8123
Container: 80
Volume Tab
Volume mapping: Click on map additional volume X2
Click on bind
Container: /srv
Host: /portainer/Downloads
Restart Policy tab
Set to never
Deploy the container.
Go to 192.168.1.250:8123
Default login: admin & admin
Chapter Five
Transmission
In this Chapter we will install "Transmission". It is a
downloader that works with your VPN. In other words, It is a
Downloader tool that use VPN.
Step by step:
Lo unico que hice fue agregar el APP template link en portainer.
lo inclui en la guia de la parte 1.
Chapter Six
In this Chapter we will learn how to ...
install the OS and setup the Raspberry Pi to boot from USB. Then, we
will install Docker, install Portainer, and install Shell In A Box.
Step by step:
Take the image and re-Created
Go to Portainer > container > Portainer image
Stop the container
Delete the image
Re-download the image with the same setting as before.
This method wont delete anything.
Use the Script as presented in the video
cd /Downloads/pi-hosted
.update_portainer.sh
exit
Go to Portainer
Open the container I want to update
Stop container
Recreate > Pull latest Image > Done
Start
App Templates > search WatchTower No need to setup
Chapter Seven
In this Chapter we will learn how to install RPI Monitor. A
monitoring solution for Docker hosts and containers with
Prometheus, Grafana, cAdvisor, NodeExporter.
In this Chapter we will learn how to Install NextCloud_Pi on
the Raspberry Pi using Docker and Portainer.
Step by step:
NextCloud Pi
This version of NextCloud is made for raspberry pi and its called
NextCloudPi
Login to Portainer
App templates >search for NextCloudPi
Deploy the Container.
Click
here
to learn more about the NextCloudPi project
Go to the URL: https://192.168.1.250:8443
Save the admin and user password displaying on the screen.
Open a new tab and go to https://192.168.1.250:8443
Login using the admin credentials you previously saved.
Username: ncp
password: (adminPassword)
Next Cloud first run > run
Under external access > No
Finish > Go back to NextCloudPi web panel
Under configurations
Click on nc-trusted-domains
Add the Raspberry Pi IP address
192.168.1.250
Add the domain if you have one.
Apply.
Go to the URL: https://192.168.1.250:8443
The error is gone.
Login with the second password previously stored.
Username: ncp
password: second password.
Enjoy NextCloud. Make sure to change the password
Blog Name
TITLE HEADING
Title description, Dec 7, 2017
Image
Some text..
Sunt in culpa qui officia deserunt mollit anim id est laborum
consectetur adipiscing elit, sed do eiusmod tempor incididunt ut
labore et dolore magna aliqua. Ut enim ad minim veniam, quis
nostrud exercitation ullamco.
TITLE HEADING
Title description, Sep 2, 2017
Image
Some text..
Sunt in culpa qui officia deserunt mollit anim id est laborum
consectetur adipiscing elit, sed do eiusmod tempor incididunt ut
labore et dolore magna aliqua. Ut enim ad minim veniam, quis
nostrud exercitation ullamco.
About Me
Image
Some text about me in culpa qui officia deserunt mollit anim..
Popular Post
Image
Image
Image
Follow Me
Some text..
Errors & Bugs
This section explain some of the errors you might get into during the
project and how to troubleshoot them. Good luck!
SSH error:
"Nasty error" while trying to SSH into the Pi
Once I change some things in the pi, I was not able to SSH again
and got an error that looks like this:
                @@@@@@@@@@@@@@@@@@@@@@@@@@@@@@@ @ WARNING: REMOTE HOST
                IDENTIFICATION HAS CHANGED! @

                @@@@@@@@@@@@@@@@@@@@@@@@@@@@@@@

                IT IS POSSIBLE THAT SOMEONE IS DOING SOMETHING NASTY!

                Someone could be eavesdropping on you right now
                (man-in-the-middle attack)!

                It is also possible that the RSA host key has just been
                changed.

                The fingerprint for the RSA key sent by the remote host is

                5c:9b:16:56:a6:cd:11:10:3a:cd:1b:a2:91:cd:e5:1c.

                Please contact your system administrator.

                Add correct host key in /home/user/.ssh/known_hosts to get rid
                of this message.

                Offending key in /home/user/.ssh/known_hosts:1

                RSA host key for ras.mydomain.com has changed and you have
                requested strict checking.

                Host key verification failed.
I fix it by getting rid of an individual known hosts
c:\users\juand\.ssh\known_hosts
In my case, I have to delete the IP or the raspberry instance
that was not letting me in.
How do I fix a"cannot open display" error when opening an X program
after ssh'ing with X11 forwarding enabled?
".xauthority" does not exist on raspberry pi 4
This
video
help me resolved the issue. I had to install putty and Xmings to
X11 apss on windows.
This package provides a miscellaneous assortment of X
applications that ship with the X Window System, including:
- atobm, bitmap, and bmtoa, tools for manipulating
bitmap images; <br />
- ico, a demo program animating polyhedrons;<br />
- oclock and xclock, graphical clocks;<br />
- rendercheck, a program to test render extension
implementations;<br />
- transset, a tool to set opacity property on a
window;<br />
- xbiff, a tool which tells you when you have new
email;<br />
- xcalc, a scientific calculator desktop
accessory;<br />
- xclipboard, a tool to manage cut-and-pasted text
selections;<br />
- xconsole, which monitors system console
messages;<br />
- xcursorgen, a tool for creating X cursor files
from PNGs;<br />
- xditview, a viewer for ditroff output;<br />
- xedit, a simple text editor for X;<br />
- xeyes, a demo program in which a pair of eyes
track the pointer;<br />
- xgc, a graphics demo;<br />
- xload, a monitor for the system load average;<br />
- xlogo, a demo program that displays the X logo;<br />
- xmag, which magnifies parts of the X screen;<br />
- xman, a manual page browser;<br />
- xmore, a text pager;<br />
- xwd, a utility for taking window dumps
("screenshots") of the X session;<br />
- xwud, a viewer for window dumps created by xwd;<br />
- Xmark, x11perf, and x11perfcomp, tools for
benchmarking graphical<br />
operations under the X Window System;
Example of X11 apps
Make sure to install the Visual OS and
NOT the LITE OS. This is to setup the boot loader
order. Which enable USB boot.
Yo segui el video y No encontre la forma de copiar al SSD
usando solo lite OS.
Follow video until minute 9.
After that is the SSH version, using only the command
which I already tried but got stuck at the end since I was
able to run the piclone in the terminal.
Accessing the pi over the network and launching the
clone utility via ssh: <br />
from a linux terminal:<br />
ssh -X -Y pi[at]raspberrypi<br />
(you can also launch this from Windows if you have
xming + putty installed)<br />
sudo apt install x11-apps<br />
xclock<br />
xeyes<br />
xauth list<br />
sudo bash<br /><br />
Then as root:<br />
touch .Xauthority<br />
xauth add raspberrypi/unix:10 MIT-MAGIC-COOKIE-1
bc6d1590cbf9f933c08cbfeb63b41<br /><br />
Then as pi:<br />
sudo xeyes<br />
sudo piclone<br />
sudo dbus-launch piclone<br />
sudo fdisk -l<br />
sudo shutdown -h now


